
WOOD
A start into the exploration of new materials.
Discussing the elements, physicality, and nature of wood, and how it can be used and altered in different ways.
Discussing the elements, physicality, and nature of wood, and how it can be used and altered in different ways.
COMPOSITION
The first exploration was getting familiar with the wood shop open to architecture major students at Virginia Tech. I got familiar with most of the saws, cutting boards, and tools, before I set out to buy material. I did small experiments with a carving knife on a piece of scrap fir wood I found and it seemed to be very good material, but when I went out to buy, they only had stock in pine. I bought an 8 foot long 4x4 and went to plane the edges and cut.
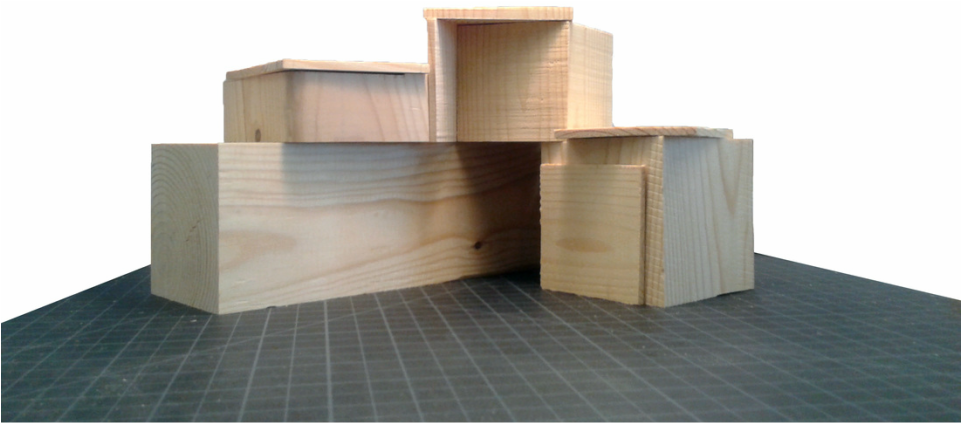
After a few smaller size cuts, I made a collection of wooden cubes, rectangular prisms, and thin plates. I took these with me back to the studio and started to work with placement.
After a few smaller size cuts, I made a collection of wooden cubes, rectangular prisms, and thin plates. I took these with me back to the studio and started to work with placement.
|
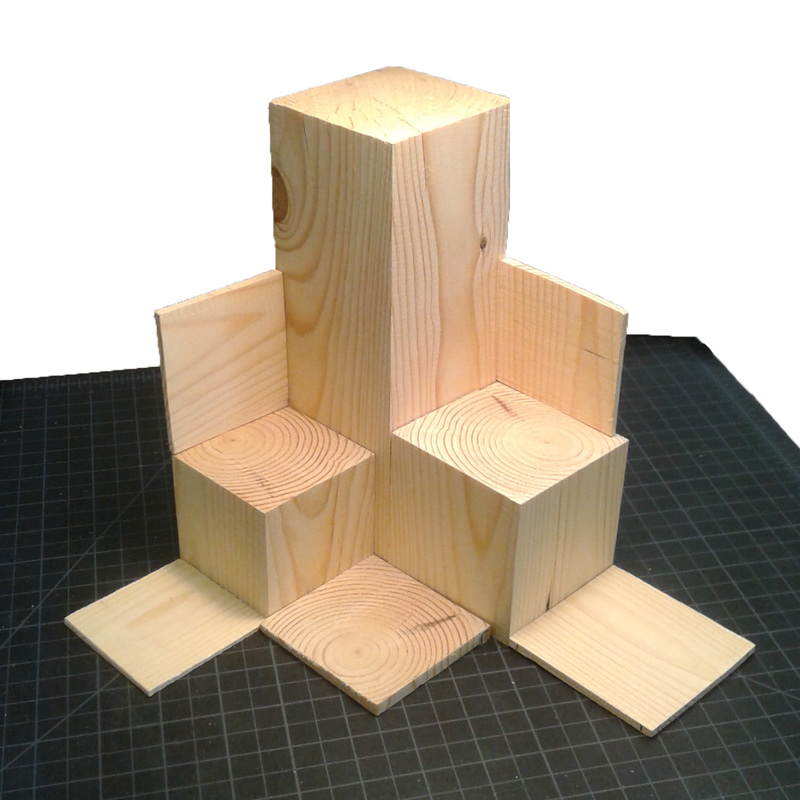
This geometric construction has the essence of being a symmetrical and grid like work, but it is anything close to symmetrical. The two cubes on the bottom are different scales of cubes and the plates are varying thicknesses and sizes, both standing up and flat.
This was a pleasing ratio after running many different types of styles and collaborating with my professor. I made sure to incorporate the paths of the wood grain contributing to the nature of the cube and switching it up in the right areas.
The blocks' proportions are all relative to themselves and seeing into the edges and angles, even squinting and taking in the composition, you start to find pathways and mixed sides creating a visual skewed experience. Pieces start to melt into one another and inverses make perpendicular mirrored presentations. The conclusion leaves a good way to understand the nature of the wood.
|
Understanding the thickness, the feel, and the broad, hard, and rigid outlines, you start to develop many ideas on how to construct different things; this is the building block effect, and human creativity thrives in this state. I went on to create a model of a shelter, understanding the space, but also taking into account the true presence and hardness of the wood.
NATURAL ASPECTS
Another project I worked was exploring the shape, malleability, and feel of wood.
Of course, this could've been done with any rough piece of scrap, but I wanted to showcase it at an exquisite level. I took a roughly 3x3 in. cube and soaked it in rubbing alcohol for two days. The point of this was to soften the wood so that it would acquire a new weight and sense of malleability.
Of course, this could've been done with any rough piece of scrap, but I wanted to showcase it at an exquisite level. I took a roughly 3x3 in. cube and soaked it in rubbing alcohol for two days. The point of this was to soften the wood so that it would acquire a new weight and sense of malleability.
|
The alcohol did it's job, and after the two days, I pulled the dripping cube out of the container and wiped off the excess. I took the damp wood outside and started to cut at the edges and corners in no real direction or point and cut slits in that I realized were easier with the grain of the wood. I had a jagged and rough piece of damp wood and after I had been satisfied with the cuts and their compositions, I blow dried and sanded it. I started with 100 grain sandpaper, and then moved to 220 before I thought it was good enough.
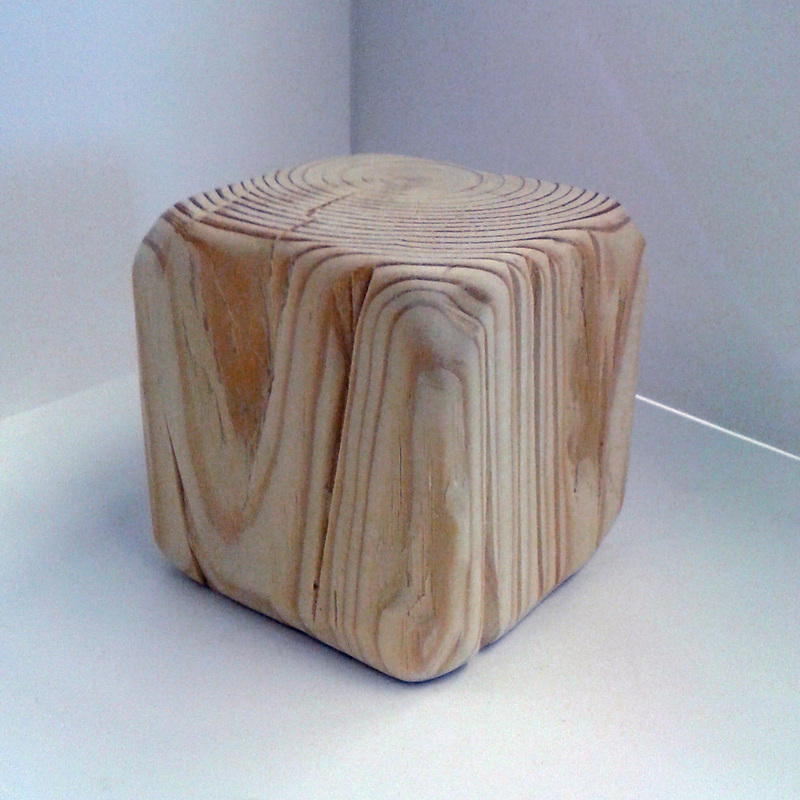
The cube was smooth, and I then wanted to add a finish. However, the natural color of the wood was beautiful and I realized that the whole point of what I was doing was to expose the natural beauty of the wood, so I just applied some thin coats of clear gloss. I let it dry on all sides for a day, and when I was done, I had a nice finish that was smooth and would protect the cube from dust and other things that could dirty the piece. |
Here are some extra view points and close ups of the cube. The texture is very smooth despite what the picture seems to look like.
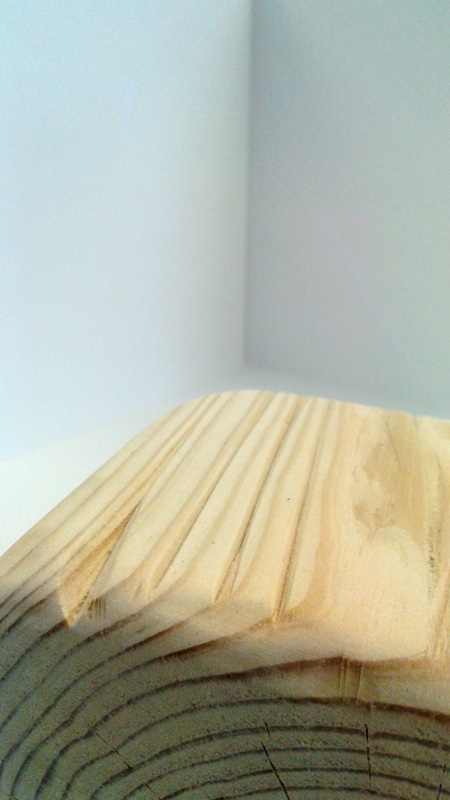
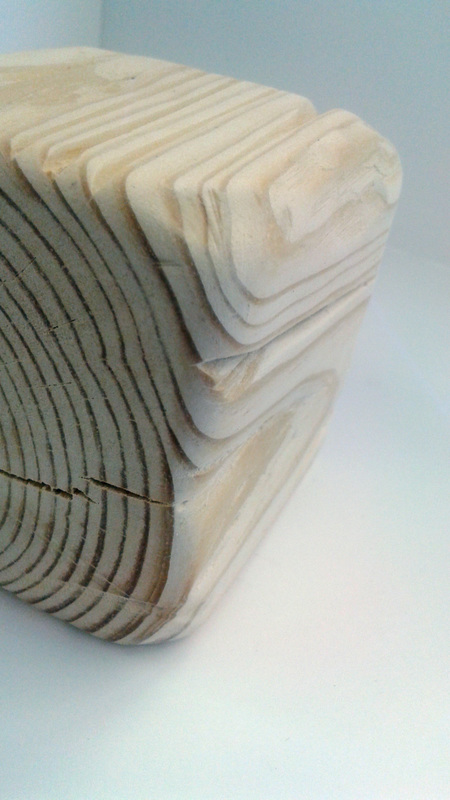
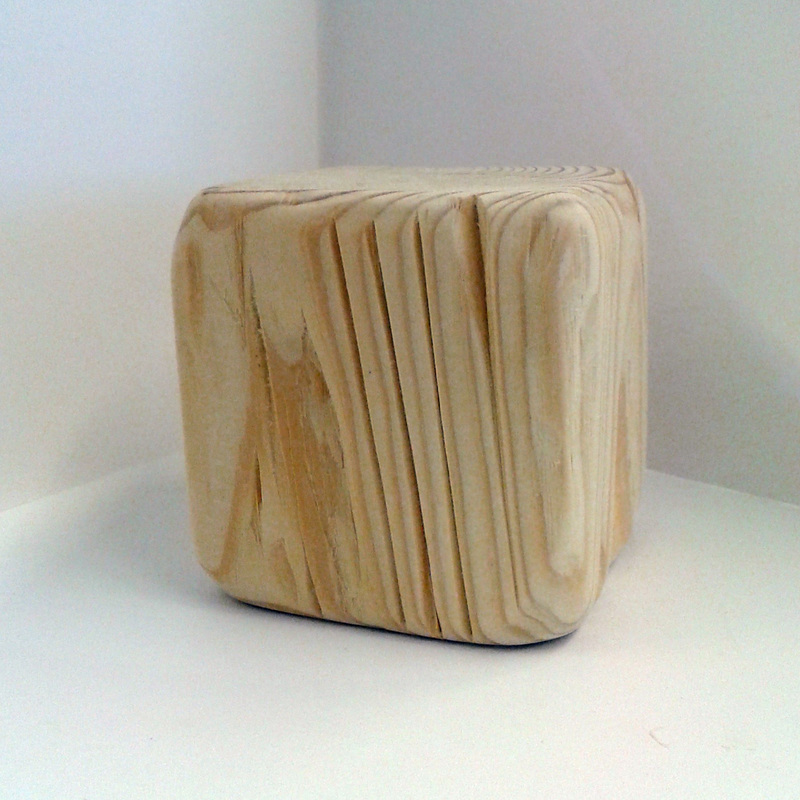
The cube feel was rounded and smooth and I found myself playing, holding, and touching it all the time. I was treating it like a toy, tumbling it around and appreciating things, like the weight, and the feel that was hard, yet resembled something of clay, and molten.
These ideas later on led to the birth of my next direction which was to create a die, or pair of dice that would also be fun to hold and contribute to the experience I had with this cube.
These ideas later on led to the birth of my next direction which was to create a die, or pair of dice that would also be fun to hold and contribute to the experience I had with this cube.
DICE DESIGN
As explained in the previous sub project, I worked with the idea of a dice.
Part of this came from the fact that the block of wood had a good weight and feel to it, and another thought was because I wanted to somehow expose the inside of the wood. I wanted to find a way to open up and reveal the wood from all possible points of view.
Part of this came from the fact that the block of wood had a good weight and feel to it, and another thought was because I wanted to somehow expose the inside of the wood. I wanted to find a way to open up and reveal the wood from all possible points of view.
|
|
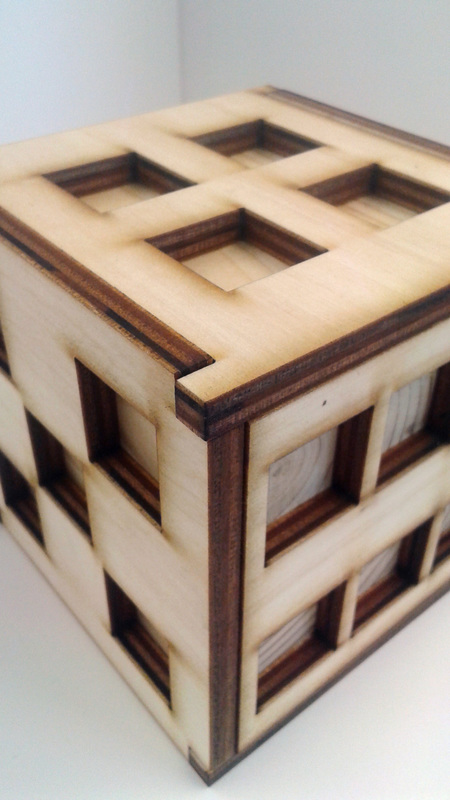
I decided I wanted to have a slight change in how the dots appeared, and rather than paste them on, I wanted to instead invert the wood and press in. Of course this would be very difficult to accomplish with the squares as shown, so I decided to have two layers. The first layer was a perfectly square and clean 3x3 in. wooden cube joined and planed from a 4x4 beam of wood. I didn't add any sort of finish to the inside cube. It's in normal condition and solid throughout. |
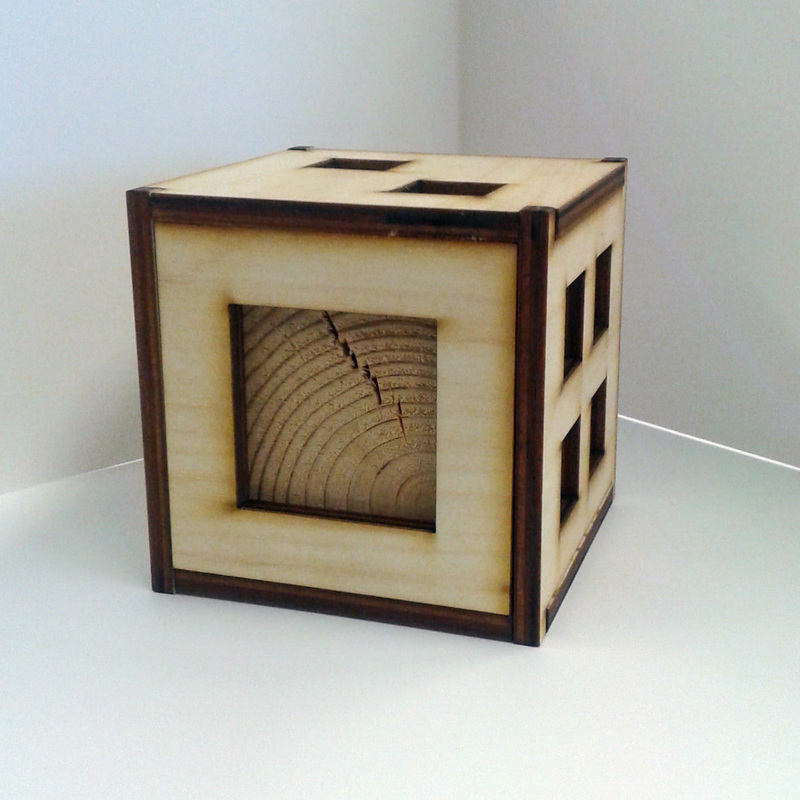
I then decided to cut out squares from a thinner piece of wood that would cover all six sides. To get a perfectly clean cut, I decided I would have to use a laser cutter. The laser cut would only accept 0.25 in. thick wood, so I decided that I would just settle on basswood plywood. In Adobe Illustrator Creative Cloud, I sketched the design of the six sides, also including an interlocking design for all six sides to come together in.
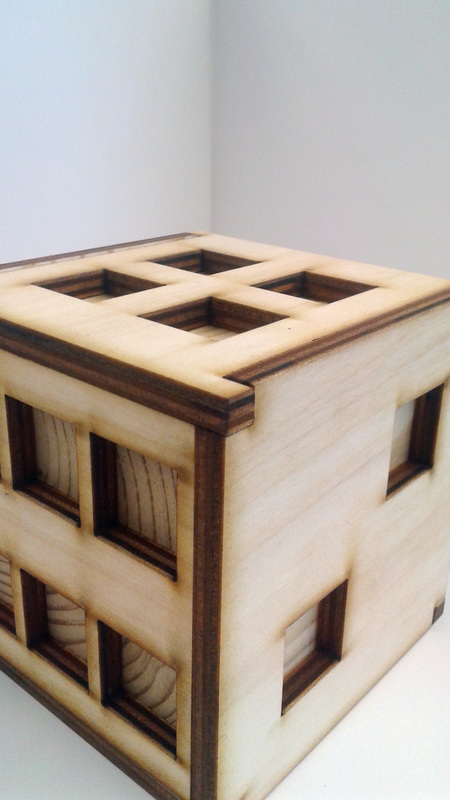
When I cut them out in the laser cutter, I noticed that some of the edges had burned, and gave rise to the idea that it was beautiful and that wood has the capability to burn. So I set out to continue burning all of the edges on my own with a lighter, until I got a satisfying dark brown on all the edges. I then assembled the sides onto the original wooden cube and used tacky glue to keep them in place.
Here are some close up views and angles of the sides and edges of the die.
The result was a very beautiful die and it is really fun to hold and play with. I did a test where I left it by itself on a table in the study lounge and I found many people picking it up, feeling the inside of the wood, placing their fingers in the slots, and throwing it up and down, testing it's weight and density.
This can be used as a normal die... but of course it's not practical. It fits the entirety of your hand and rolling it around on the ground makes you feel like you're dulling the corners. This piece then serves more as a table garnish or small centerpiece/desk trophy.
This can be used as a normal die... but of course it's not practical. It fits the entirety of your hand and rolling it around on the ground makes you feel like you're dulling the corners. This piece then serves more as a table garnish or small centerpiece/desk trophy.
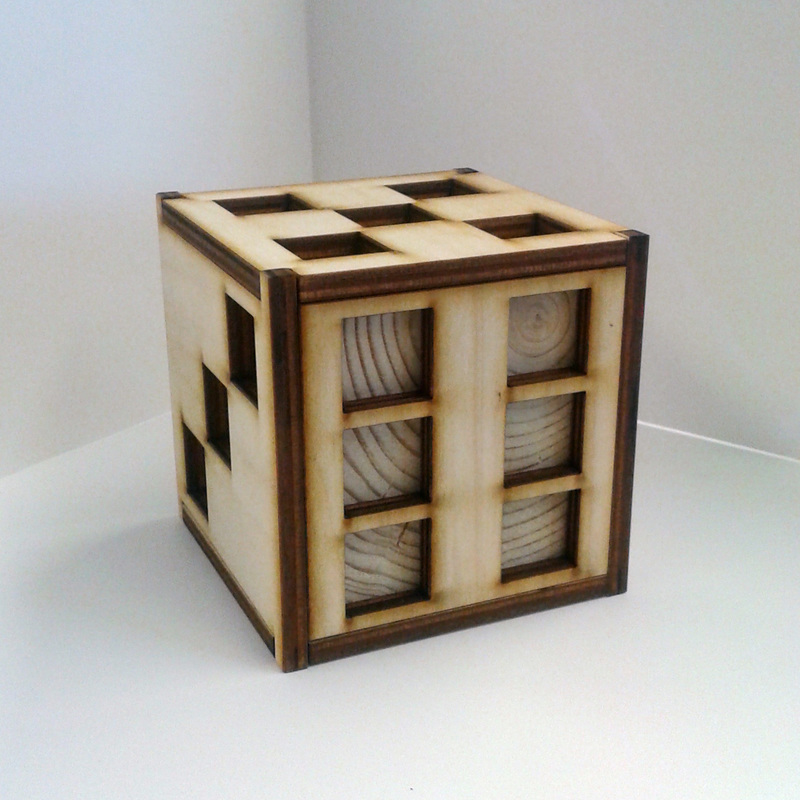
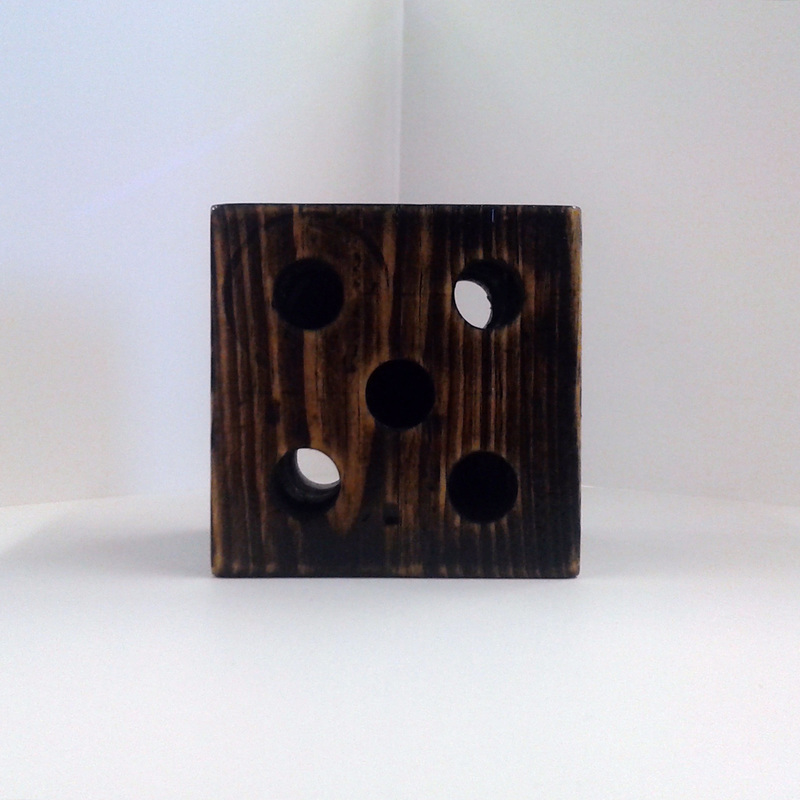
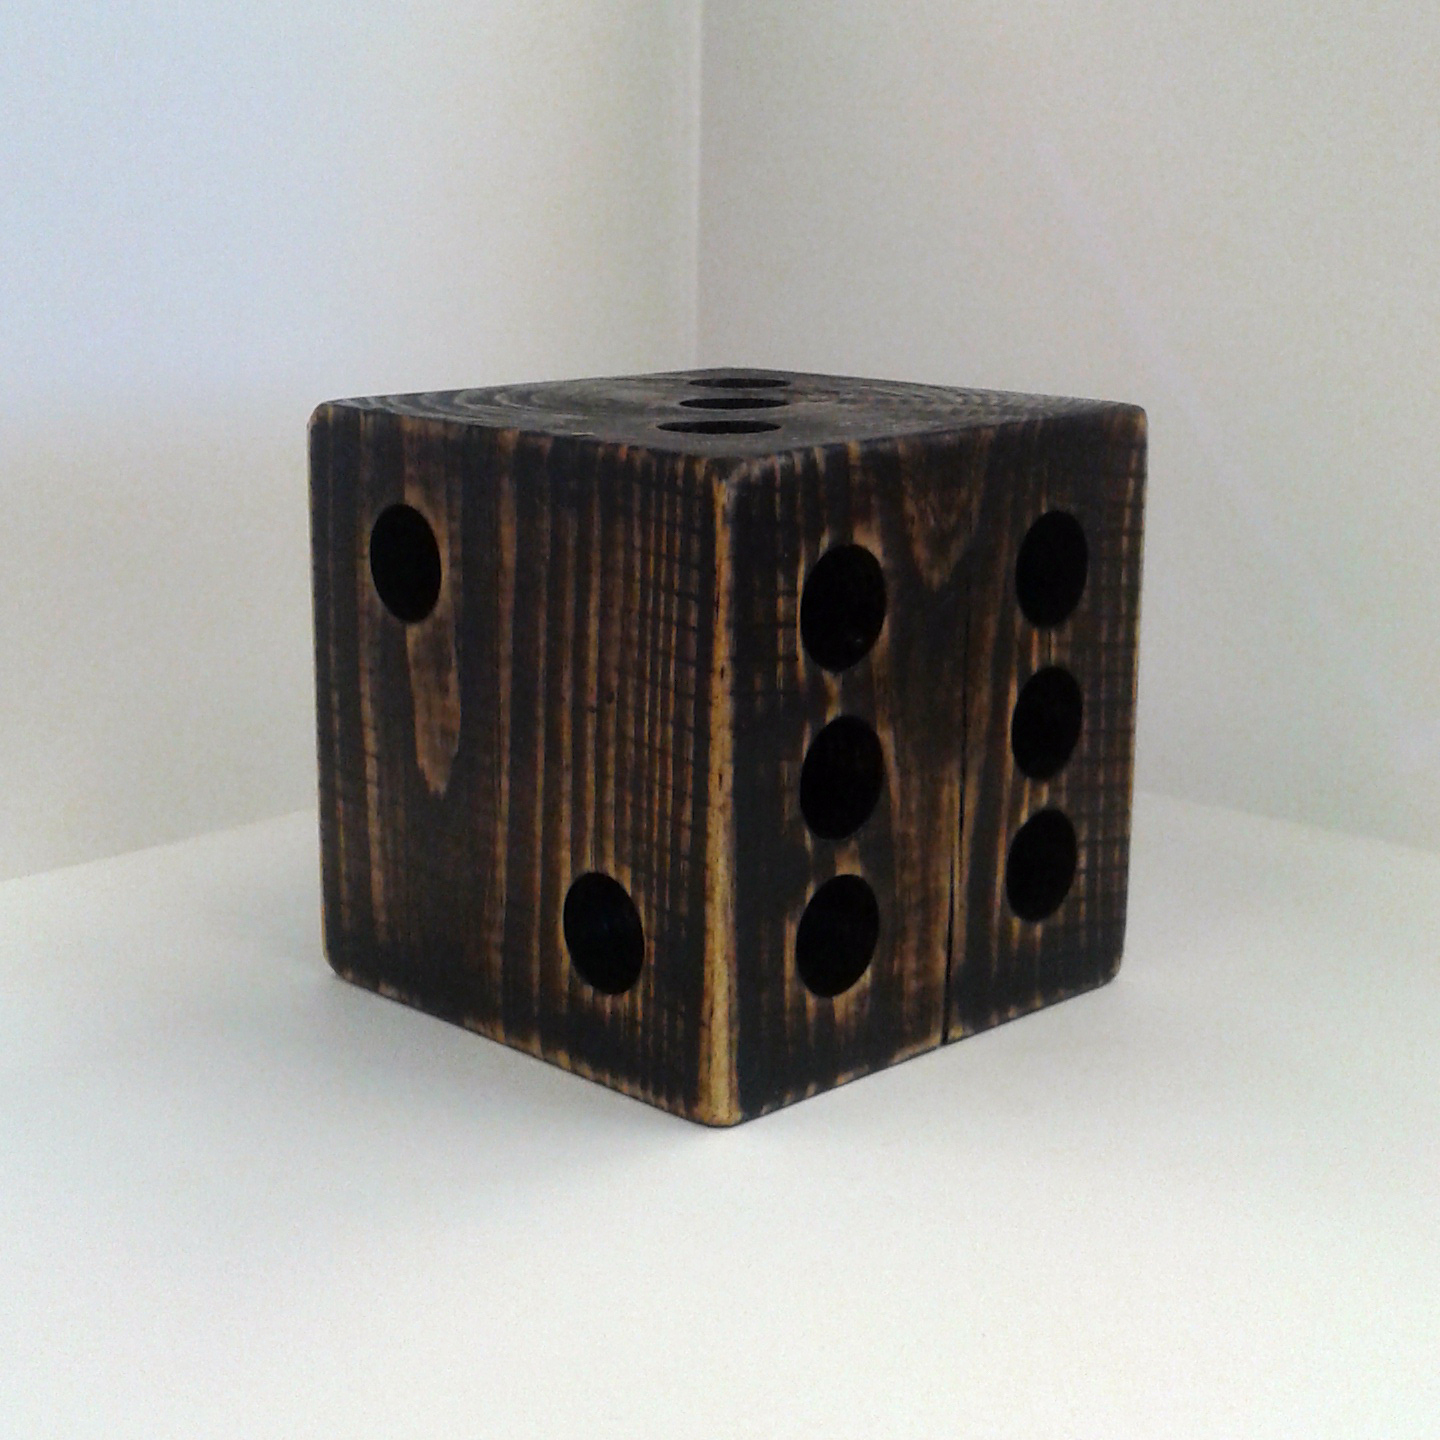
Another dice design that I worked on was one of the first ideas I had, until I finally had the time to go on with it. The original point of the idea was to drill holes into a block of wood to, as before, expose the inside of the wood. However, no matter what I did, or what holes I was aiming for, they all were displeasing, and nothing was fitting the aesthetic I was going for.
|
The only holes that had a good placement and composition were those that resembled a dice side. Well I couldn't do it without having the thought in your head of the cube being a dice, so I just decided to make it a dice anyway. Another thing I was looking to do in regards to the original project was to have drilled holes that connected with each other in a tunnel network within the cube. |
|
This makes you interested in looking around the cube to find the light that shines through all of the tunnels. Looking at it is fun and trying to explain what's going on in the middle with no background of creating it like me is a challenge to the viewer, and serves as a very well thought out element of design.
|
|
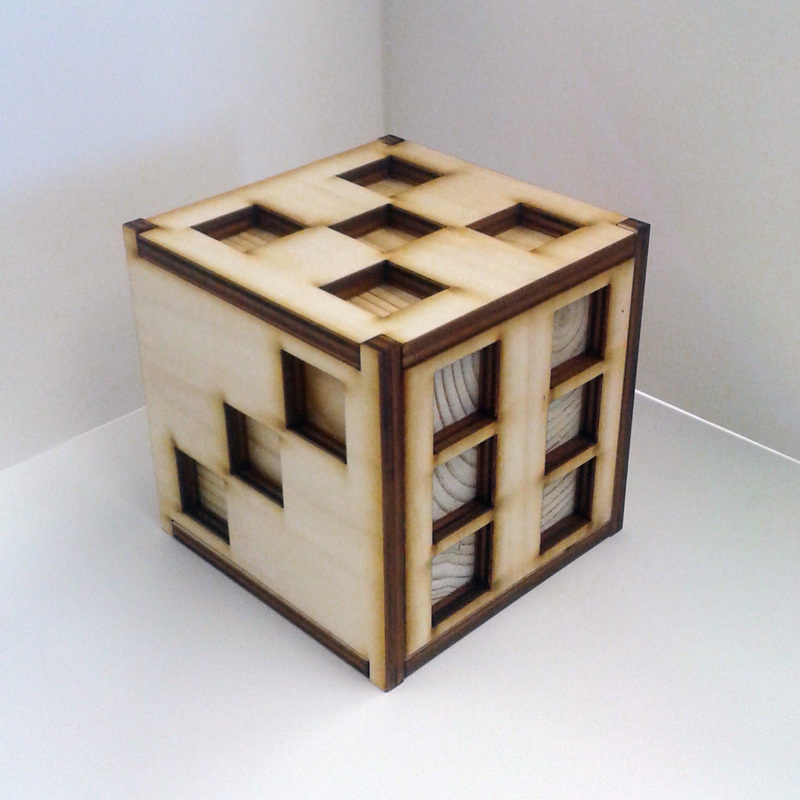
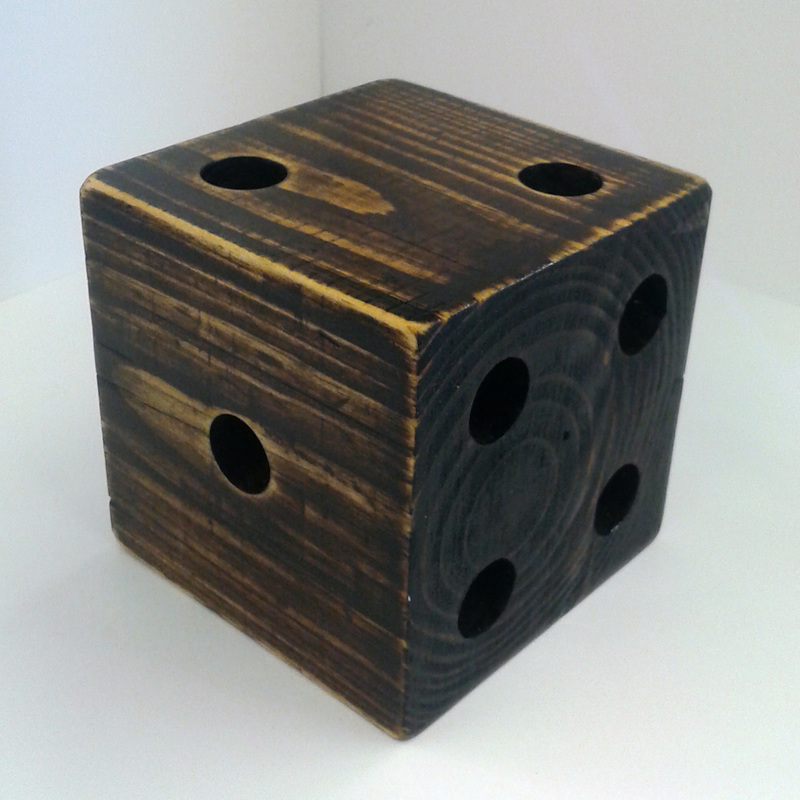
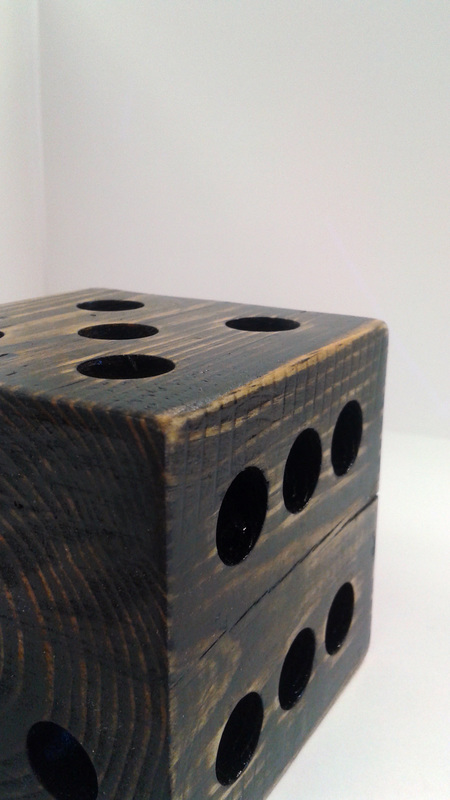
Here is an angle that shows the drilled holes passing all the way through the dice to create the same hole for opposite sides. The corners of the two, are also the corners of the five on the other side. This occurs on the three, in which the corners match up with the corners of the four on the opposite side. All the while this is happening there are tunnels for the other holes too. |
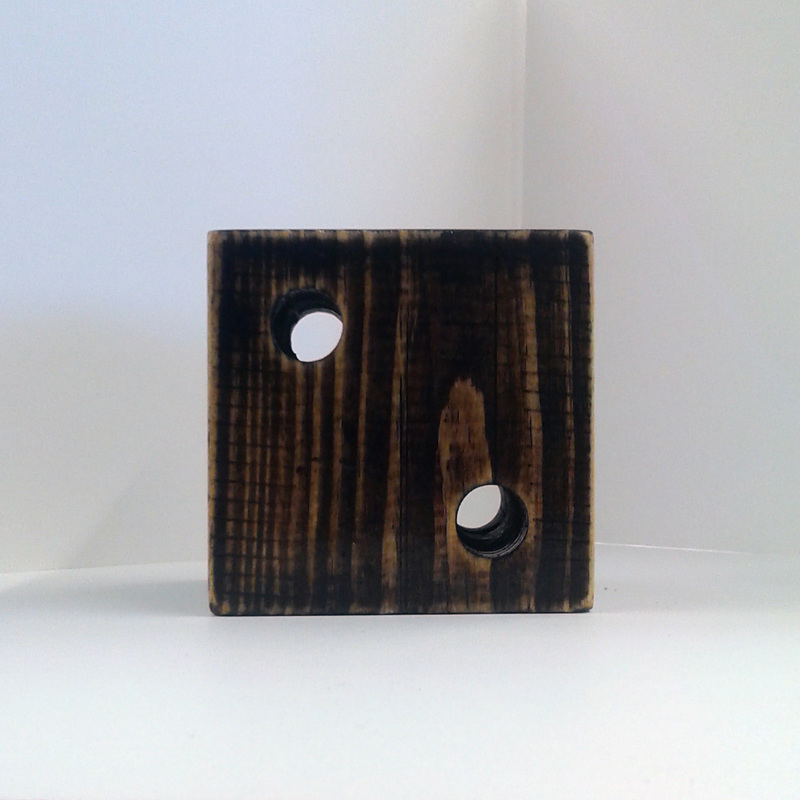
Any hole that doesn't go through all of the way, does go through to a 3/4 distance and connects to another tunnel system from an adjacent side.
|
A good note that adds to the design elements of the piece is the use of the dark wood stain. It was used for two reasons, one being that light that shines through the holes is easier to see vs the original pine wood, exposing the main idea of the project. The second, is that this dice looks like it can take a tumble, and a good emphasis for that was the dark stain. |
|
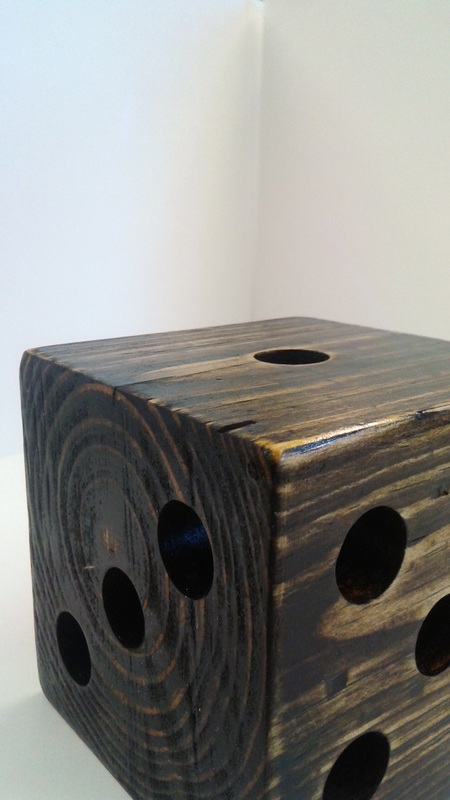
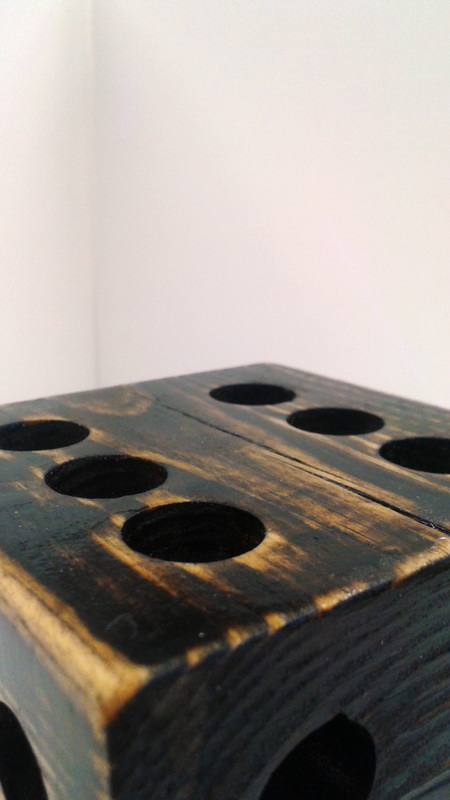
I sanded the edges and the corners, and it gives a worn, but solid aesthetic that contributes to the design.
|
Block Dimensions: - 3x3 in. Materials: - 4x4 Pine wood - Drill press + 5/8 in. bit - 100 grain sandpaper - Dark Walnut Miniwax Wood Stain - Clear Gloss Miniwax Finish Grid Pattern + Details: - eighths and halves - 5 layers of stain - 2 day drying period - Sanded before and after stain dry - Gloss applied and dried for 1 day |
Estimated time to construct and finish: 9 hours
SCULPTURE
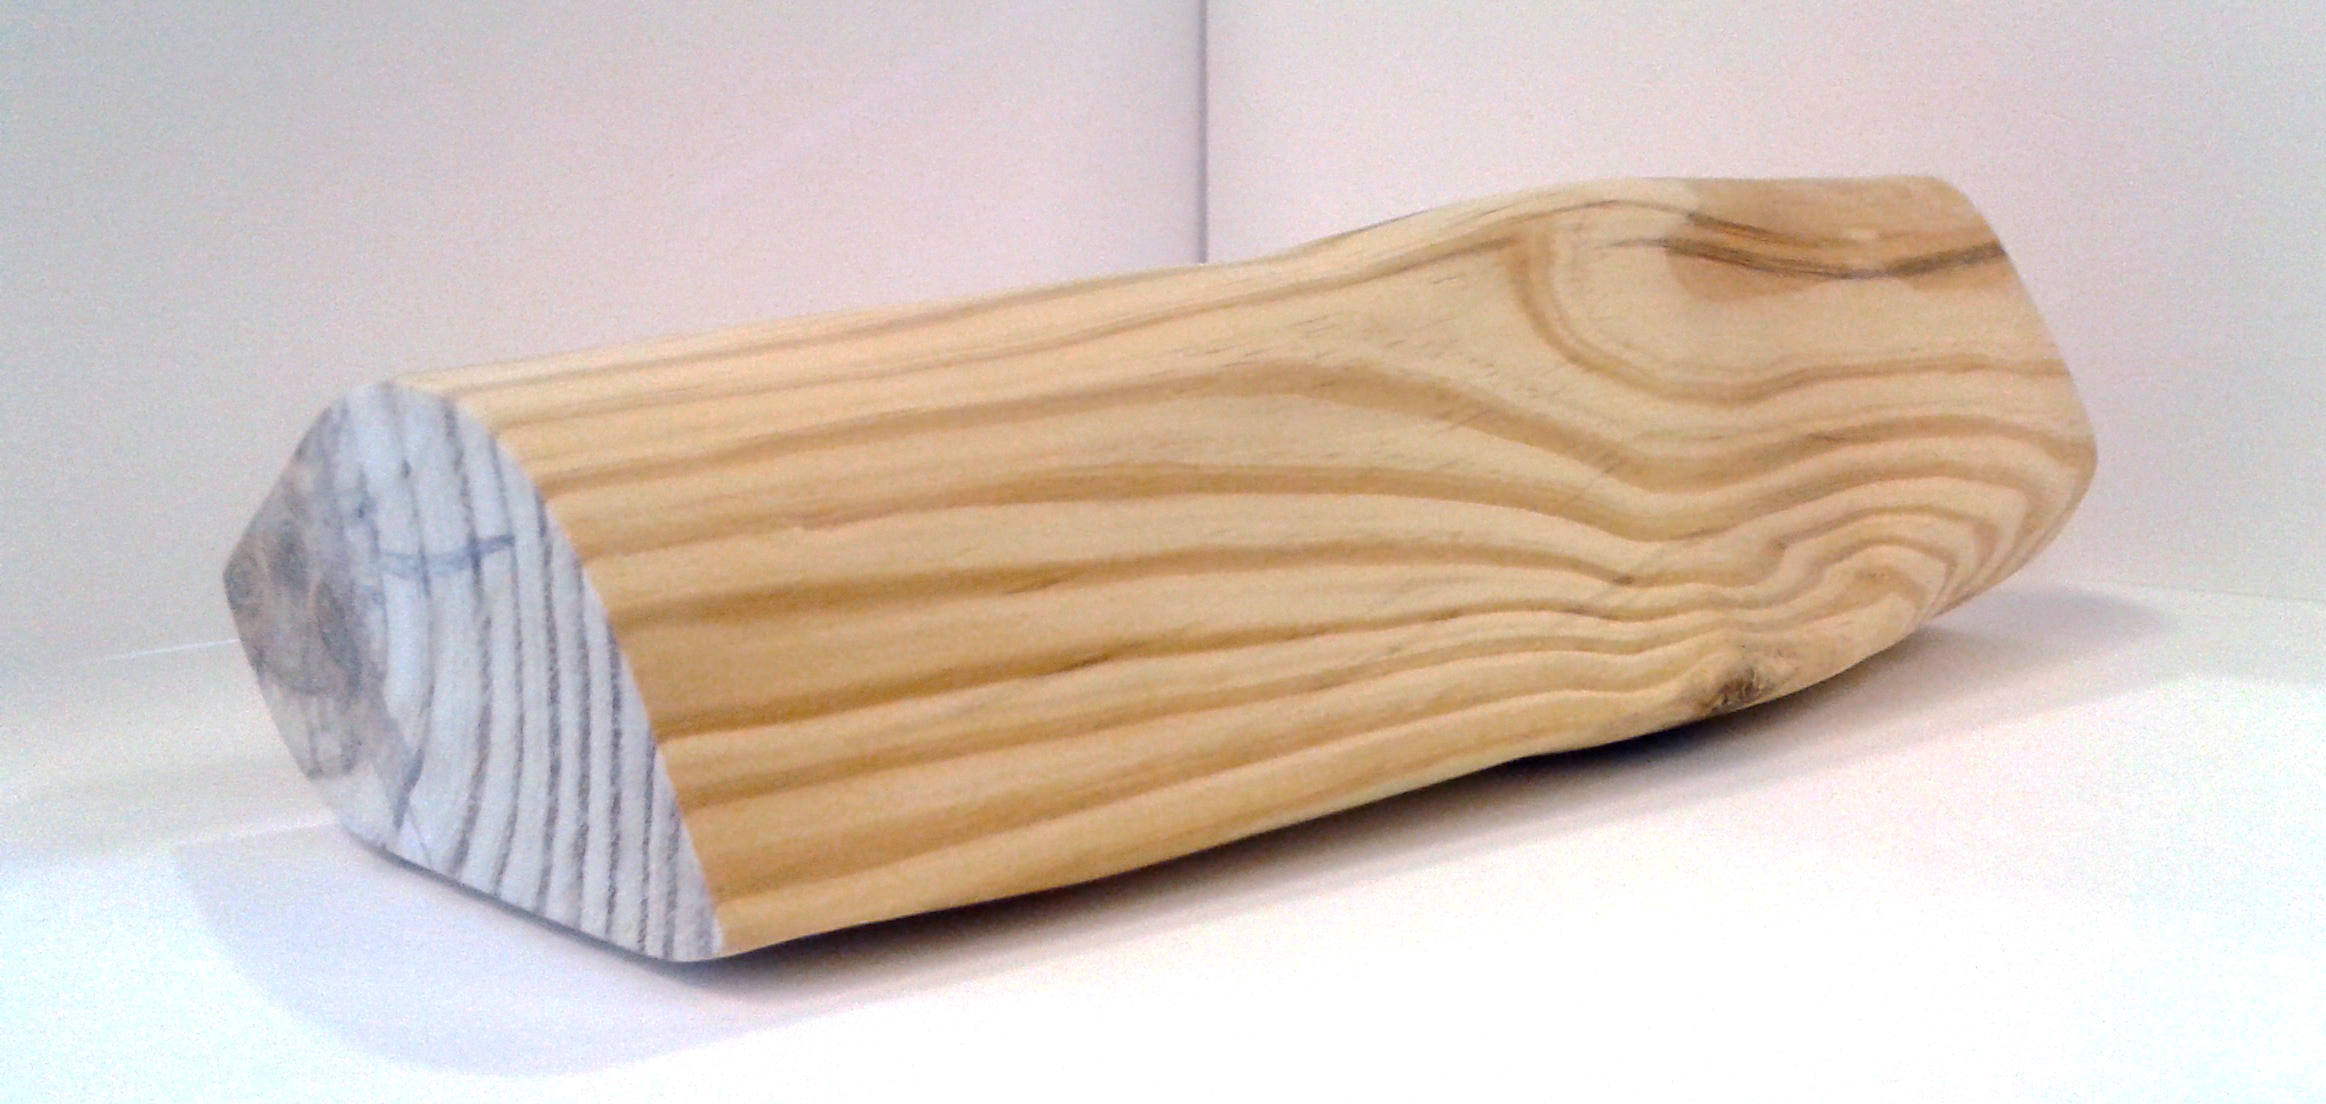
This was a project that went over working with a slab of wood and exploring the side grains, core, and natural points of interest within a normal 4x4 in plank.
|
I ran the normal post of wood through the band saw at first at an angle and got a well proportioned cut.
I then went on to use a chisel and hammer to chip away parts of the wood with the flow of the wood grain. I did this by clamping the wood to a work bench and using 5 different chisels varying in different lengths, sizes, and angles. When I finished the main rough cuts, I started to sand it. |
The point of this project was to make the wood look beautiful and nice, and to have you explore it or see wood differently.
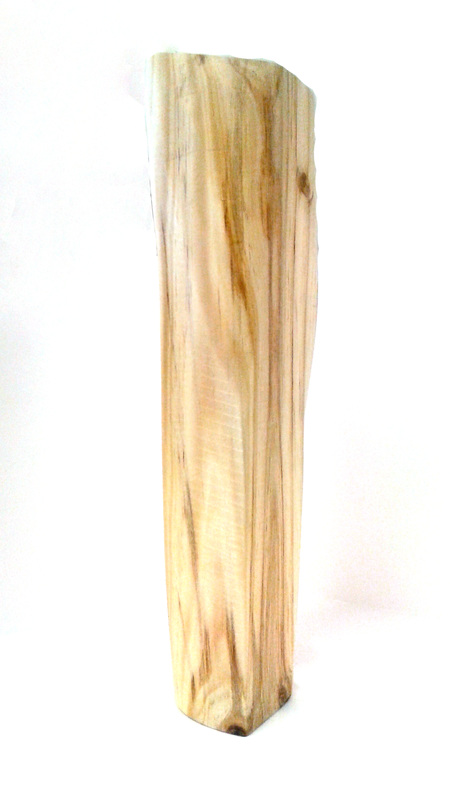
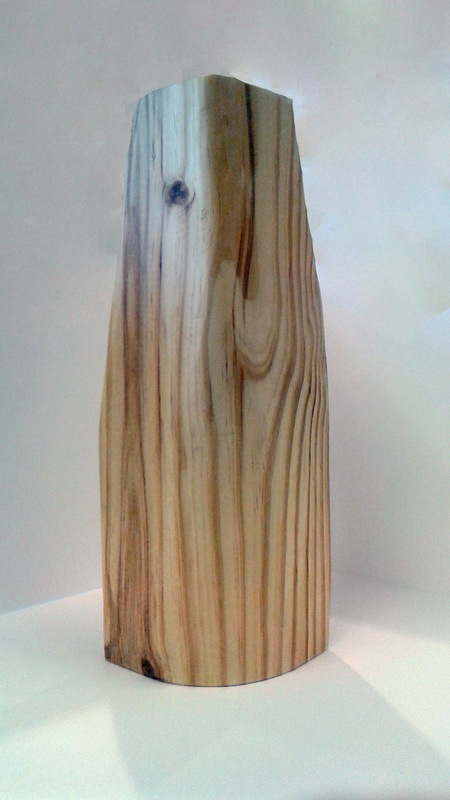
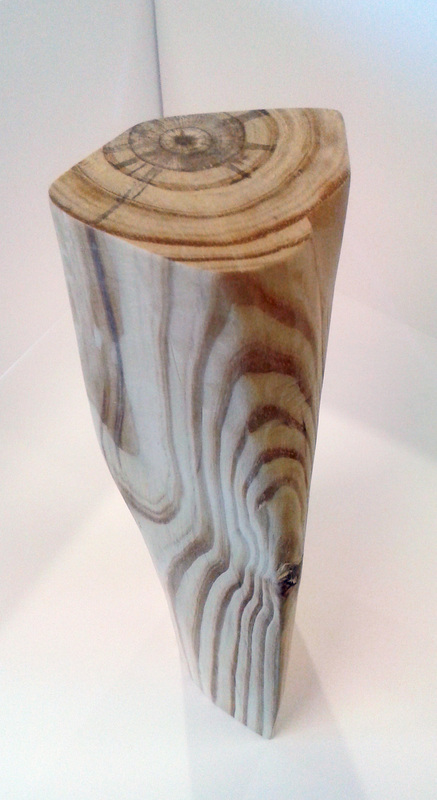
These are all the same piece of wood but taken from different angles. You can see how interesting this project is because no matter how you turn it, you get a different perspective or exploration of it. In the first picture you see a really skinny post. In the second, it seems wide and shaped from the bottom up. The third perspective shows the squareness and the bulges in random areas, and exposing the smoothness of the wood grain that then evolves into a sharp cut.
|
To further explain this progression from smooth to sharp, you can see it at a better angle here. I made a really sharp edge, like a crease as if the wood is being pinched, and it smoothly transitions to a smoother part of the wood.
The whole sculpture is full of these little tricks that create an overall very optical illusioned piece. |

|
To finish it, I sanded it down to 200 grain sandpaper and applied finishing Minwax.
DELTA SHELTER
This was a third iteration of an original idea I had had about making a home that was a small, yet two story house. As background, the original idea was a shelter that would withstand floods in flooding areas, and to have a second story above the level. They fit closer to one another as houses and still have a lot of room. The idea of having such a strong support system in the first place did everything to suggest a second story. The model could feature a sitting area on top, and the huge door way suggests possible use of a small sailboat in case of need to leave the house.
|
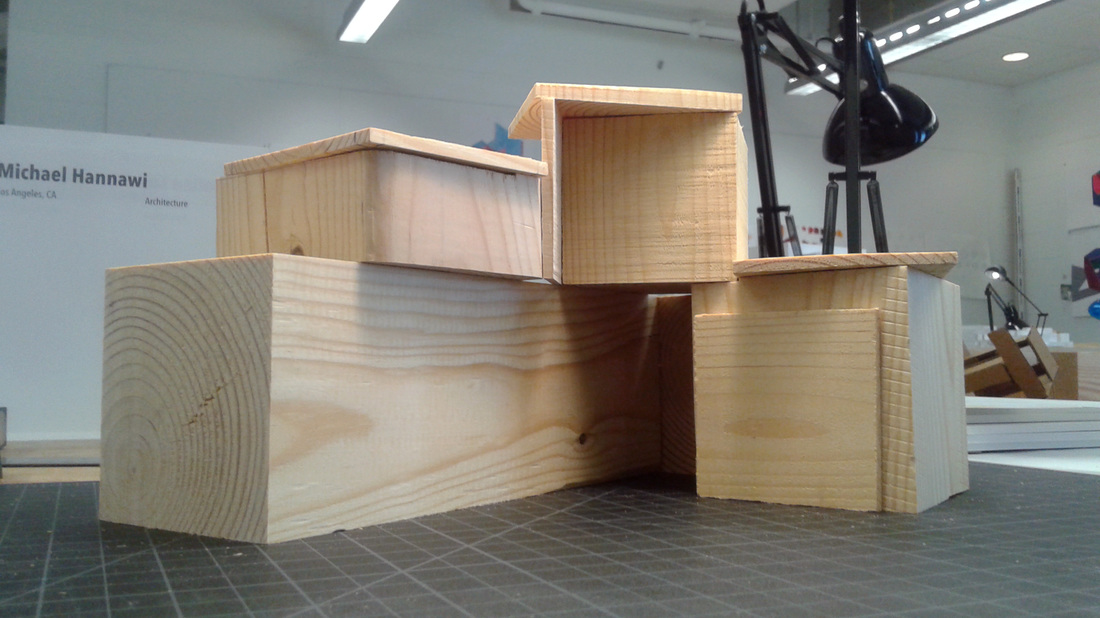
However, the construction was found with my exploration of wood on small scale mainly because I felt that the wood relative to the size of the model was hard and rigid. The sharp corners show the powerful walls density to withstand. This was my main goal, and the proportion of the different cubes and plates were great additions after having built off of and learned from the previous exploration of composition.
This is a standing perspective view and also illustrates the looming strength and power in the material of pine wood which is being explored. |
|
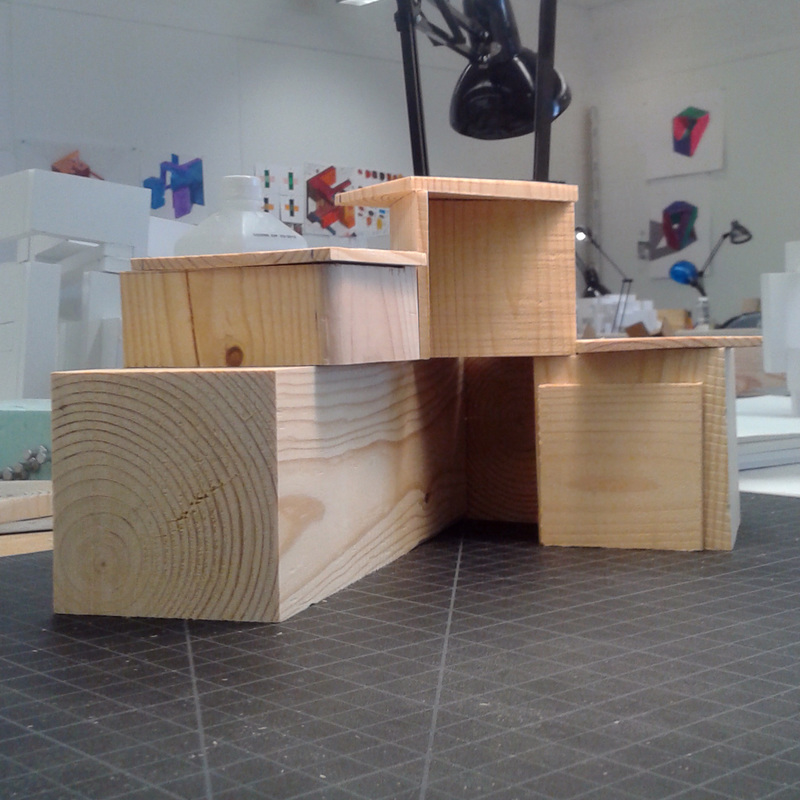
Another angle of the wood can be seen showing off the door way, and the dynamic of the roof in the highest point of the shelter.
|
Another side technique I found myself using was the incorporation of angles and how they were balanced mainly due to my other exploration in boxes, which you can see also on this website under Projects \\ Boxes \\ Angled Designs.
Many viewers have asked on more information regarding some sort of windows and other objectified ideals, but I stand by the idea of exploring the nature of the material. The wood was to be only used by itself, and including other objects not contributing to the idea that you are trying to accomplish is actually a subtraction to your model. This can be paralleled to the idea of not including furniture or appliances to a floor plan, as they are deemed unnecessary and not part of designing the layout and general idea of the map. |
|
|
